You are in: Home >PHOTOSHOP CS5 TUTORIALS> Post
Step 1: Create a new document
First of all create a new white document 1000×600 and then create the thunder shape using the Polygonal Lasso Tool (L).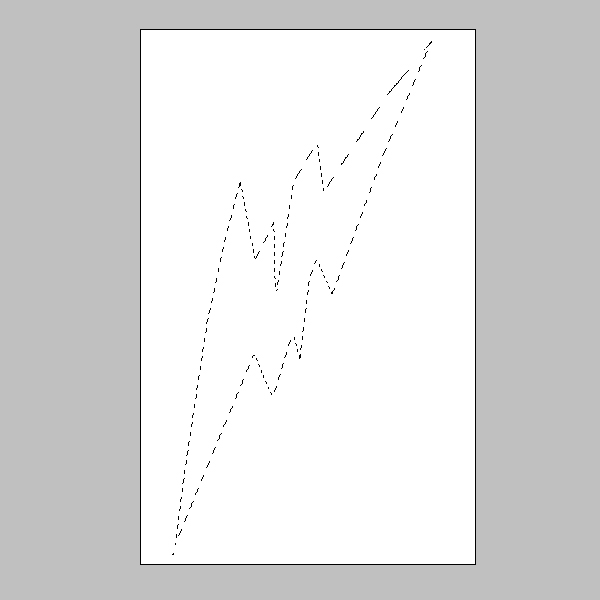
Step 2: Apply Color
Create a new layer and with the selection still activated fill it with #ff9c00.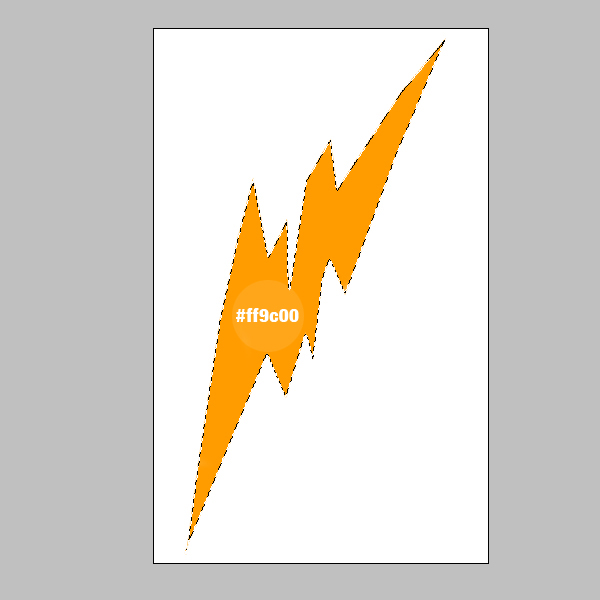
Step 3: Create the 3D effect
Next you need to duplicate the layer two times and change the color of these 2 layers to #ffc66c. Also move them behind the first layer and place them like in the image below.
Step 4
Next you need to merge the two layers you just created in step 3 and using the Polygonal Lasso Tool (L) make selections like below and fill them with the same color as the shape.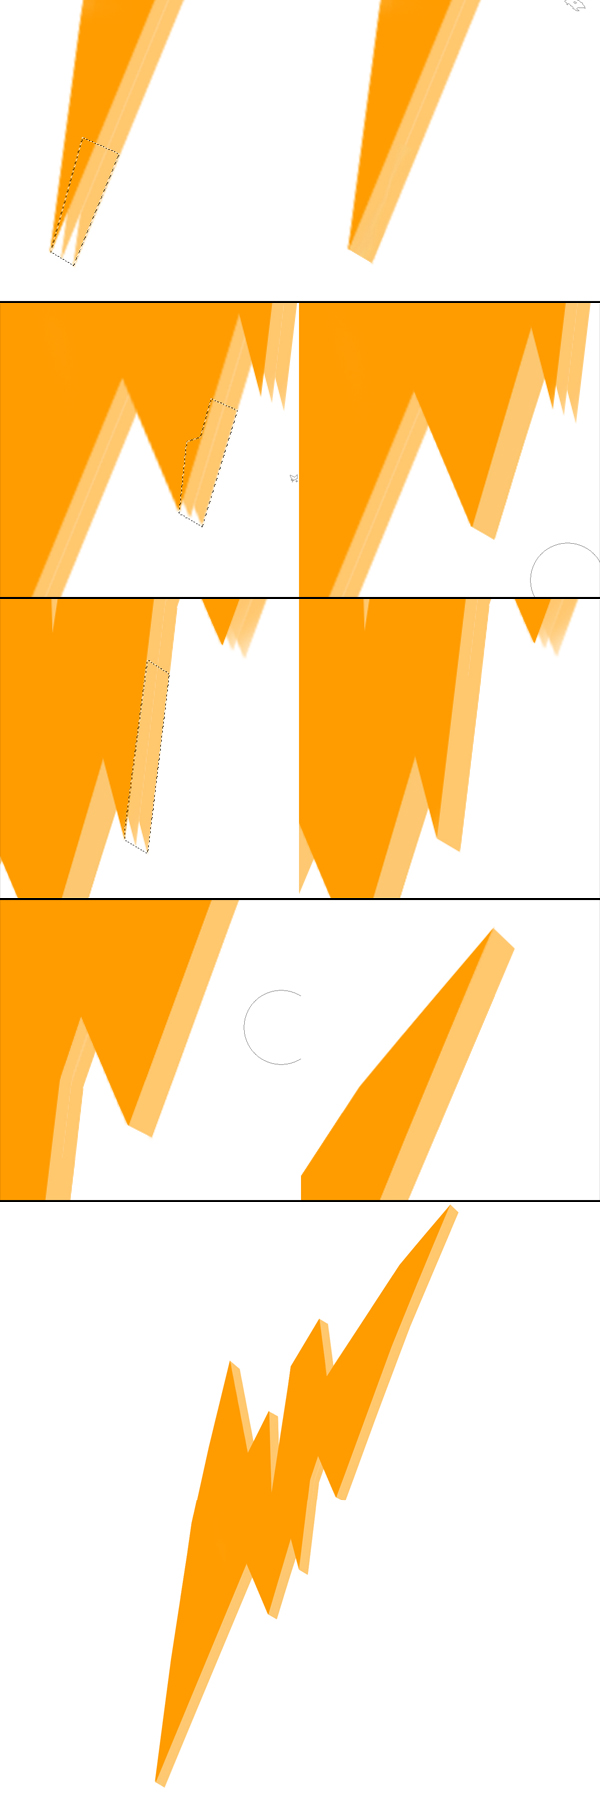
Step 5: Add shadows
Using the Burn Tool set to Shadow and 60% Exposure you need to draw over the corners of the layer created in step 4.

Step 6: Darken shape
Again using the Burn Tool (O) you need to select the first thunder layer and burn the corners of the shape.
Step 7: Add stroke
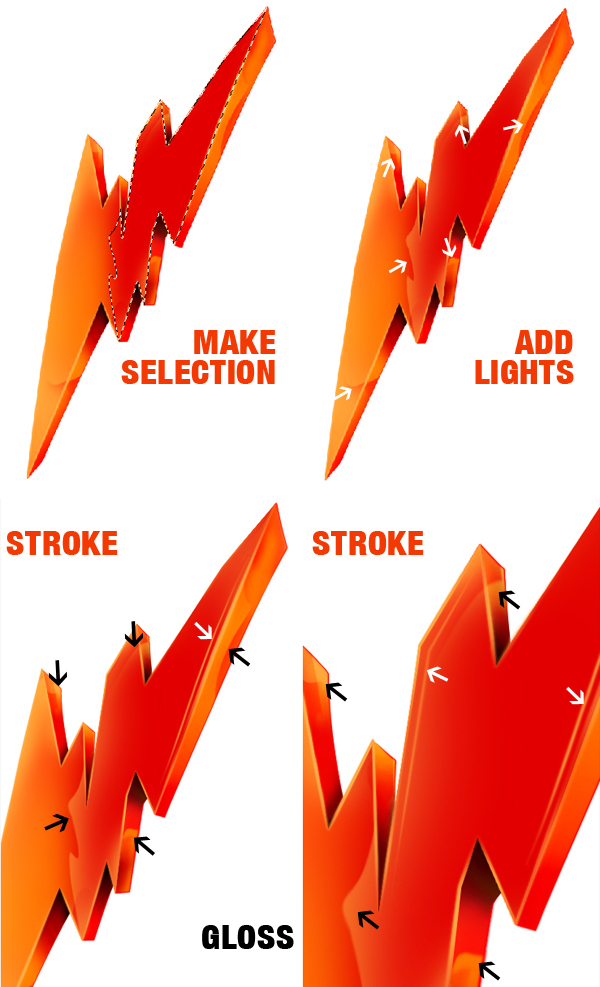
Hold down Command key and then click on the first shape layer thumbnail to make a selection around it, create a new layer above this then with the Lasso Tool (L) select and press the Right + Click on the screen and create a 3 px stroke with this color #ffab45.Use the Blur Tool (R) to soften the edges of the stroke.


Step 8
Create a new layer on top of all the layers and using the Brush Tool (B) set to the same color used for the stroke #ffab45 you need to draw on all the corners of the thunder.
Step 9: Shadows
It is time to add some more intense shadows. For this select the layer behind the original thunder shape and using the brush set to #800300 draw on the corners like in the image below.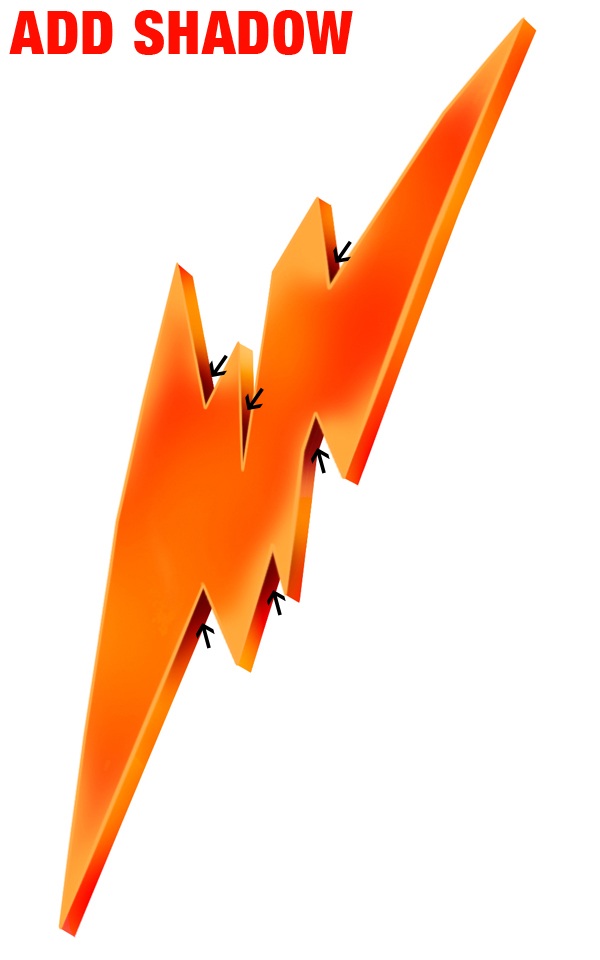
Step 10
Duplicate the stroke from step 7 and go to Image > Adjustments > Brightness/Contrast and set it to (brightness -150, contrast +30). You will also have to move the new layer right a few pixels like below.
Step 11
Use the Eraser Tool (E) and erase the corners of the stroke and use the Blur Tool (R) on the stroke to make it blend in with the other shapes.
Step 12: Light colors
Create some more light colors on the thunder using the Brush Tool (B) set to #ffa93c. Make a selection like below, create a new layer on top of all the layers and start adding some color. Remember to use a soft brush for this.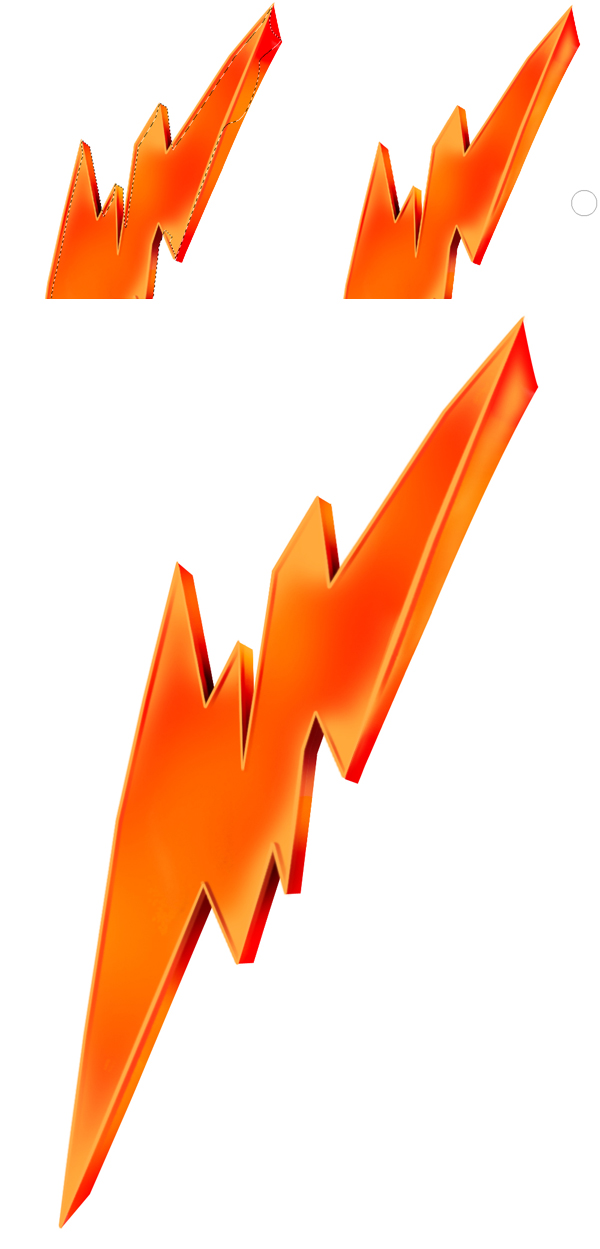
Step 13
Create a new layer and make a selection like below. Draw with the Brush Tool (B) set to #6b000 and set the layer to Overlay.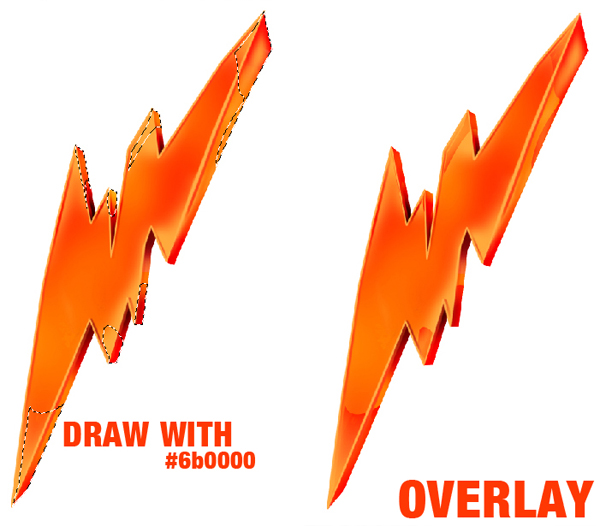
Step 14: Improving the shape
Next you need to work some more on the layer behind the original thunder shape. You need to change the shape of the layer a bit by making some selections like below and drawing over the layer with some more colors and shadows.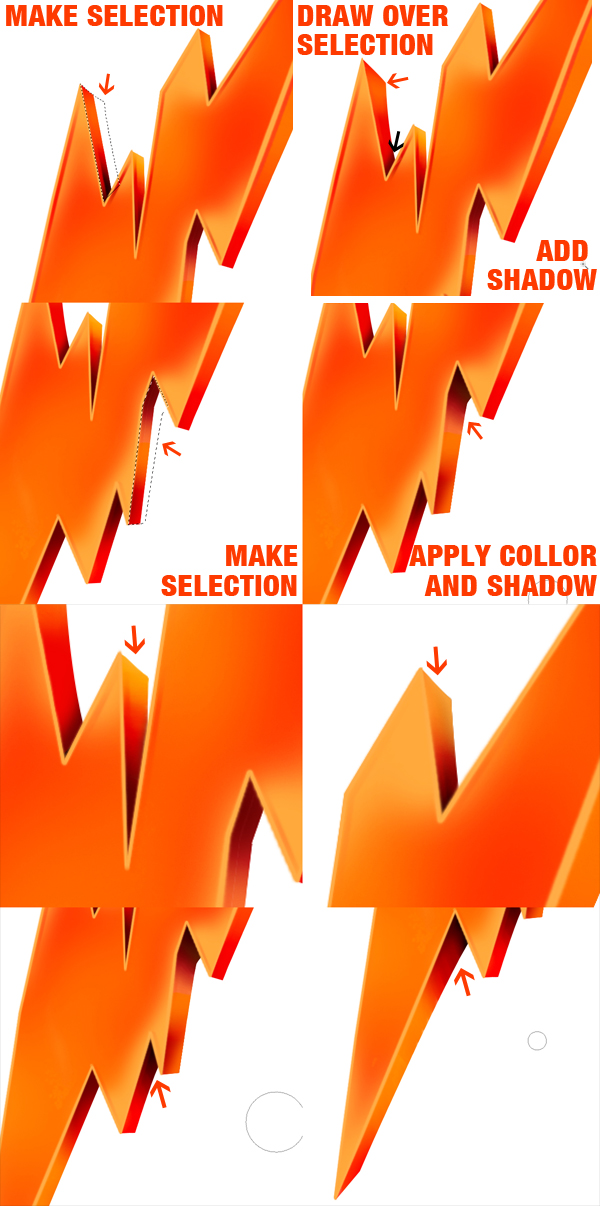
Step 15
Create a new layer and make a selection like below and using the Brush Tool (O) draw on top of the selection with #e20001 and on the bottom of the selection with #ffa739.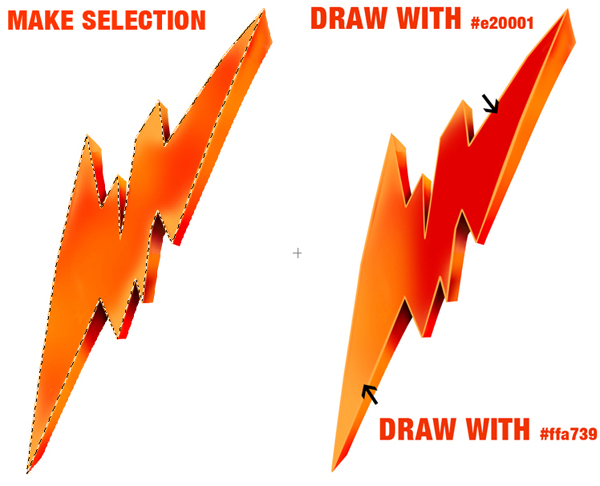
Step 16: Details
Use the Eraser Tool (E) and erase the corners of the stroke.
Step 17: Add Gloss
It is time to add some more gloss on the shape. Create a new layer on top of all the layers and make different selections like below, then using a yellow color and a soft brush you need to simply draw some faded shades of light on the shape then set the layer to Overlay or Soft Light. You can also erase some parts of the gloss and make it fade out. In the end add some final strokes, smudge them and lower the opacity.Remember that you will have to create different selections for each gloss you apply.
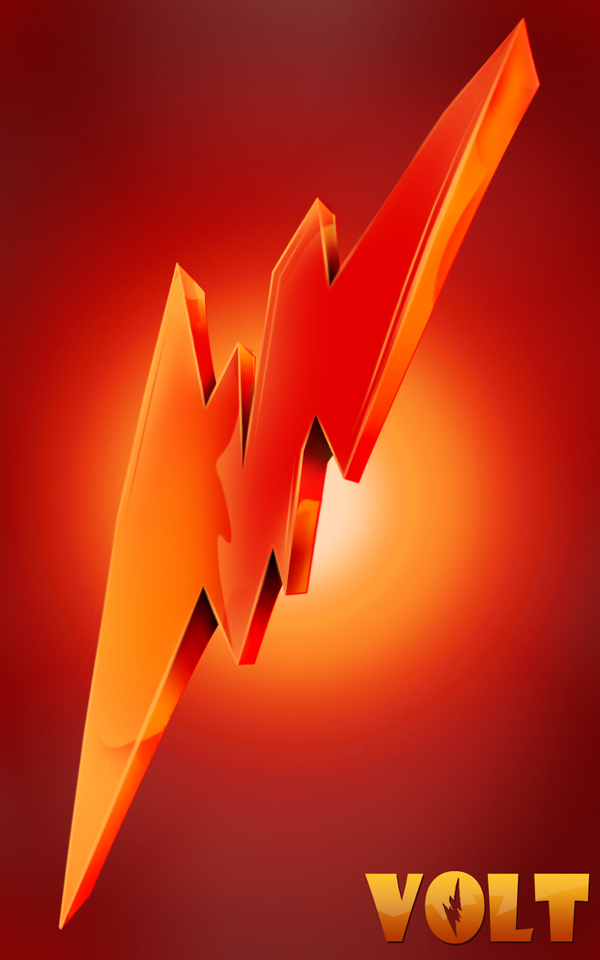
Final Result
No comments:
Post a Comment