Source: http://cs5tutorial.net/sunflower-wallpaper/
In this tutorial we will learn how to create sunflower themed wallpaper.
Start working by creating a new file (File>New) of 1920×1200px/72 dpi. Using the Paint Bucket Tool (G), fill the new background layer with #70AF56 color.

Find a stock photos with sunflower on it, I have used this photo: Sunflower from SXC. I would like to thank the author: Pat Herman.

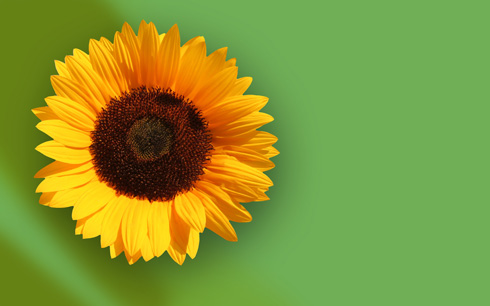
Cut it out and insert it on a new layer:

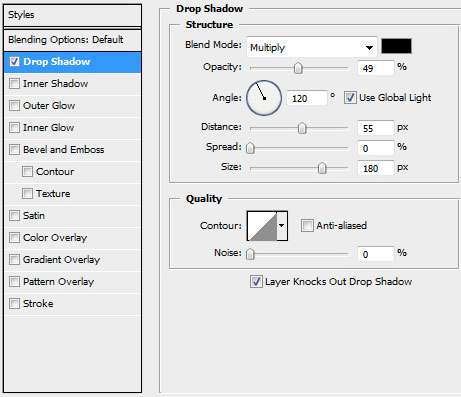
Set the next demonstrated styles by making a mouse click on this layer on the layers’ panel: Blending Options>Drop Shadow

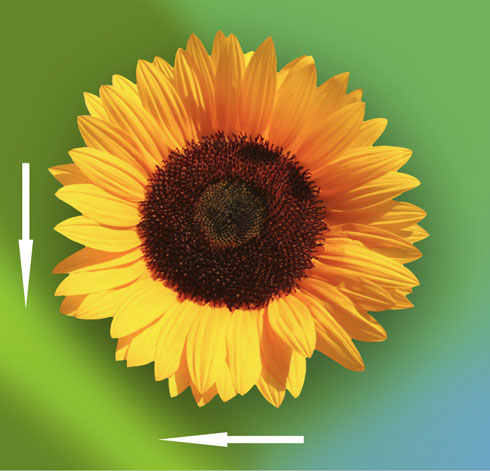
Next we’ll choose a standard brush on a new layer (Create new layer) and paint on the left side of the flower with #658215 color, this way creating the effect of a fold. This layer needs to be situated under the layer with the flower (on the layers’ panel).

Create a new layer and apply the same brush to paint the right lowest corner. The layer in this case has the color #5AA7D9

On the next new layer (Create new layer) we’ll apply the same brush used before, creating an arbitrary highlight on the fold (on the left bottom side). The brush is of the color #8FBC13
Create a new layer and choose for it a standard brush to paint the background behind the flower. The brush is of the color #EED30A. Place this layer under the layer with the flower (on the layers’ panel).
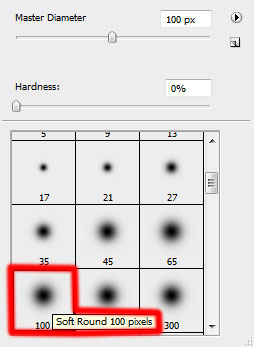

Download a set of ready to use brushes for Adobe Photoshop: Cloud Brushes by Blazter [JavierZhX].
Create a new layer and apply here the brush from downloaded set: Cloud Brushes by Blazter [JavierZhX]
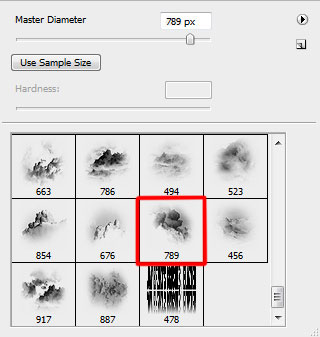

The layer’s parameters: Fill 71%

Now we’ll represent an ornamented line. Firstly we’ll draw its path. The instrument applied in this case Pen Tool (P) (Path Mode).

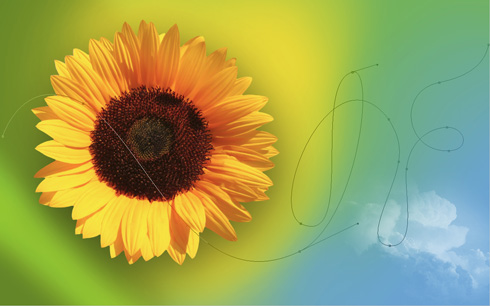
Now we should create a new layer, here select the standard brush of white color (Diameter 9, Hardness 100%). Using the Direct Selection Tool (A), we have to select the line and then change the instrument on the Pen Tool (P). Then click on the right button on the selected line apply Stroke Path with Brush options.

Click on the same layer on the bottom part of the layers’ panel on Add a Mask option and choose a standard brush of black color to clean out the indicated flower’s zone and the marked element on the right side.

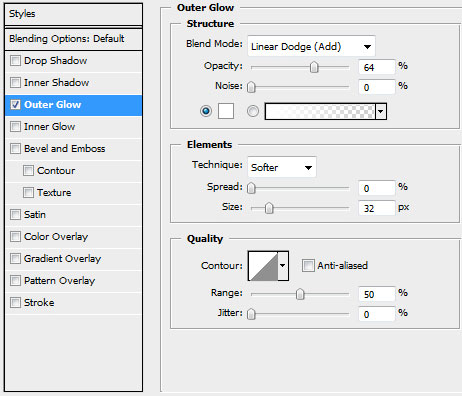
Select for the same layer the next shown styles: Blending Options>Outer Glow

In this tutorial we will learn how to create sunflower themed wallpaper.
Start working by creating a new file (File>New) of 1920×1200px/72 dpi. Using the Paint Bucket Tool (G), fill the new background layer with #70AF56 color.

Find a stock photos with sunflower on it, I have used this photo: Sunflower from SXC. I would like to thank the author: Pat Herman.

Cut it out and insert it on a new layer:

Set the next demonstrated styles by making a mouse click on this layer on the layers’ panel: Blending Options>Drop Shadow


Next we’ll choose a standard brush on a new layer (Create new layer) and paint on the left side of the flower with #658215 color, this way creating the effect of a fold. This layer needs to be situated under the layer with the flower (on the layers’ panel).


Create a new layer and apply the same brush to paint the right lowest corner. The layer in this case has the color #5AA7D9

On the next new layer (Create new layer) we’ll apply the same brush used before, creating an arbitrary highlight on the fold (on the left bottom side). The brush is of the color #8FBC13

Create a new layer and choose for it a standard brush to paint the background behind the flower. The brush is of the color #EED30A. Place this layer under the layer with the flower (on the layers’ panel).


Download a set of ready to use brushes for Adobe Photoshop: Cloud Brushes by Blazter [JavierZhX].
Create a new layer and apply here the brush from downloaded set: Cloud Brushes by Blazter [JavierZhX]


The layer’s parameters: Fill 71%

Now we’ll represent an ornamented line. Firstly we’ll draw its path. The instrument applied in this case Pen Tool (P) (Path Mode).


Now we should create a new layer, here select the standard brush of white color (Diameter 9, Hardness 100%). Using the Direct Selection Tool (A), we have to select the line and then change the instrument on the Pen Tool (P). Then click on the right button on the selected line apply Stroke Path with Brush options.

Click on the same layer on the bottom part of the layers’ panel on Add a Mask option and choose a standard brush of black color to clean out the indicated flower’s zone and the marked element on the right side.

Select for the same layer the next shown styles: Blending Options>Outer Glow


No comments:
Post a Comment